
As a passionate photographer and technology enthusiast, I have always been intrigued by the incredible advancements in artificial intelligence (AI) and its impact on various industries.
One area that particularly caught my attention is how AI can revolutionize headshot creation, allowing anyone to achieve professional results without the need for expensive equipment or a team of experts.
In this blog post, I want to share my personal experiences and insights on how to use AI to create professional headshots.
Whether you’re a business professional, a photographer, a job seeker, or simply someone who wants to enhance their visual identity, this guide will provide you with step-by-step instructions, practical tips, and techniques to harness the power of AI in the world of headshot photography.
Over the years, I have embarked on a journey to explore and experiment with various AI-powered photo editing tools specifically designed for headshot enhancement.
I vividly remember the excitement and curiosity that filled me when I first discovered these tools, wondering if they could truly deliver professional-looking results.
Through trial and error, I have learned the ins and outs of utilizing AI algorithms to adjust facial features, enhance skin tones, retouch blemishes, and achieve stunning headshots that exude professionalism.
Through my personal experiences, I have come to appreciate the numerous benefits that AI brings to the table.
The ability to customize enhancements, fine-tune details, and apply virtual makeup has allowed me to create headshots that capture the unique essence of individuals while maintaining a natural and authentic look.
Moreover, the convenience, cost-effectiveness, and time-saving aspects of AI-based headshot editing have opened up new possibilities for businesses, photographers, job seekers, and individuals looking to make a lasting impression.
In this comprehensive guide, I will walk you through the step-by-step process of using AI to create professional headshots.
We will delve into preparing your photos, selecting the right AI tools, adjusting facial features, enhancing skin tones, refining lighting and exposure, applying virtual makeup, and customizing the enhancements to suit your preferences.
I will also share tips on troubleshooting common issues, maintaining authenticity, and understanding the limitations of AI in headshot creation.
So, whether you are seeking to enhance your online presence, create polished headshots for professional profiles, or simply explore the fascinating world of AI photography, this blog post will equip you with the knowledge and techniques needed to leverage AI and transform ordinary photos into stunning, professional headshots.
Without wasting time, let’s dive in.

Helpful Content: Best AI Portrait Generator Tools to Create Compelling Portraits
Step-by-step Process on How to Use AI to Create Professional Headshots
A. Prepare Your Photo
Preparing your photo is a crucial step in using AI to create professional headshots. By selecting a high-resolution headshot photo and ensuring it is well-lit and properly focused, you lay the foundation for successful AI enhancements that will elevate your headshots to the next level.
In this section, we will analyze the step-by-step process to achieve this.
1. Choose a high-resolution photo
When selecting a headshot photo, opt for one with a high resolution. Higher resolution photos contain more detail and provide the AI algorithms with a wealth of information to work with.
A resolution of at least 300 dots per inch (dpi) is recommended for optimal results. High-resolution photos allow the AI algorithms to accurately analyze facial features and make precise enhancements.
2. Consider lighting conditions
The lighting in your headshot photo plays a crucial role in achieving professional results. Aim for well-lit conditions that showcase the subject’s facial features and bring out their natural beauty.
Natural light is often the best option, so consider taking your headshots outdoors or near a well-lit window. Soft, diffused lighting provides even illumination and minimizes harsh shadows.
3. Ensure proper focus
An essential aspect of a professional headshot is sharpness and clarity. Ensure that your photo is properly focused on the subject’s face.
A sharp and well-focused headshot photo allows the AI algorithms to analyze facial features accurately and make precise enhancements.
Use the autofocus feature on your camera or tap on the subject’s face on a smartphone to ensure accurate focus. You can also use any of these AI camera apps too.
4. Evaluate exposure
Proper exposure is vital in headshot photography. Evaluate the exposure of your photo, ensuring a balanced distribution of highlights and shadows.
Overexposed photos may lose important details, while underexposed photos can result in a lack of clarity and definition.
Adjust the exposure settings during the photo capture or use post-processing tools to fine-tune the exposure if necessary.
5. Check for distractions
The background of your headshot photo should be simple and uncluttered to avoid distractions.
A clean background helps draw attention to the subject’s face and ensures that the AI algorithms focus on enhancing the primary features.
Remove any objects or elements that might divert attention away from the subject, allowing their facial expressions and characteristics to take center stage.
You might out this article on best AI image background remover tools if need be.
6. Consider composition
The composition of your headshot photo influences its overall impact. Position the subject’s face within the frame, leaving some space around the head and shoulders.
This composition provides flexibility for cropping or resizing the image later without losing important facial details.
Consider the rule of thirds, placing the subject’s eyes along the intersecting lines for a visually pleasing composition.
7. Save a copy of the original
Before proceeding with AI-based enhancements, always save a copy of the original photo in its unedited state.
This serves as a reference and allows you to revert back to the original if needed.
Saving a copy ensures that you have a backup and provides the flexibility to experiment with different editing techniques while preserving the integrity of the original image.

B. Choose An AI Photo Editing Tool Or AI Headshot Generators
Choosing the right AI photo editing tool is a crucial step in utilizing AI to create professional headshots.
With the advancements in AI technology, there are numerous options available, each offering unique features and capabilities.
In this section, we will explore the process of researching and selecting a reliable AI-powered photo editing tool specifically designed for headshot enhancement.
1. Research AI photo editing tools
Begin by conducting thorough research on the available AI-powered photo editing tools in the market. Look for tools that specifically mention headshot enhancement as one of their key features.
Consider reputable companies and well-established brands that have a track record of delivering high-quality results.
Read reviews, explore online forums, and seek recommendations from fellow photographers or professionals in the field.
2. Assess the features and capabilities
Once you have a list of potential AI photo editing tools, dive deeper into their features and capabilities. Look for tools that offer a wide range of enhancements specifically tailored for headshots.
Some key features to consider include facial feature adjustments, skin tone enhancement, blemish removal, lighting and exposure adjustments, and virtual makeup application.
Evaluate whether the tools offer customization options and allow you to fine-tune the enhancements according to your preferences.
3. Consider ease of use and user interface
The user interface and ease of use are important factors to consider when selecting an AI photo editing tool.
Look for tools with intuitive interfaces that make the editing process smooth and user-friendly.
Consider whether the tool offers guided workflows or tutorials to assist you in achieving the desired results. A tool that is easy to navigate and understand will save you time and effort during the editing process.
4. Evaluate the quality of results
The ultimate goal of using an AI photo editing tool is to achieve professional results. Evaluate the quality of the enhancements produced by each tool.
Look for examples, before and after comparisons, or sample headshots edited with the tool to assess the level of improvement and the naturalness of the results.
Pay attention to details such as realistic skin tones, accurate adjustments of facial features, and overall enhancement without sacrificing authenticity.
5. Consider compatibility and integration
Consider the compatibility of the AI photo editing tool with your preferred editing software or platform.
Some tools may work as standalone applications, while others may integrate with popular photo editing software or online platforms.
Choose a tool that seamlessly fits into your existing workflow and allows for easy integration without any compatibility issues.
6. Evaluate pricing and affordability
Consider the pricing structure of the AI photo editing tools on your list. Some tools may offer a one-time purchase option, while others may require a subscription or offer a freemium model.
Evaluate the pricing in relation to your budget and the value the tool provides. Keep in mind that investing in a reliable and high-quality AI photo editing tool can significantly enhance your headshot creation process and yield professional results.
7. Trial and experiment
Many AI photo editing tools offer free trials or demo versions. Take advantage of these opportunities to test the tools firsthand and see how they perform with your own headshot photos.
Experiment with different tools to compare their results, user experience, and overall satisfaction.
This hands-on approach will help you make an informed decision and select the tool that best aligns with your needs and preferences.

C. Upload Your Photo
Now that you have selected a reliable AI-powered photo editing tool, it’s time to upload your chosen headshot photo and harness the power of AI to create professional headshots.
Uploading your photo to the AI platform is a straightforward process that sets the stage for the subsequent enhancements and transformations.
In this section, we will explore the step-by-step process of uploading your photo to the AI tool and getting ready for the magic to unfold.
1. Launch the AI tool
Open the AI photo editing tool on your computer or access it through a web-based platform. Ensure that you have a stable internet connection for a smooth uploading process.
Familiarize yourself with the tool’s user interface, as it may vary depending on the specific software or platform you have chosen. Take a moment to explore any additional features or settings that the tool offers.
2. Locate the upload option
Within the AI tool, locate the option to upload or import your headshot photo. This option is usually prominently displayed on the main screen or accessible through a menu.
Look for buttons or icons that indicate file uploading, such as an arrow pointing upwards or a camera symbol. Click or tap on the appropriate option to proceed with the upload process.
3. Select your headshot photo
A file selection dialog box or a file browser will appear after clicking on the upload option. Navigate to the folder where your headshot photo is stored on your computer or device. Click on the photo file to select it for uploading.
Some AI tools may allow you to select multiple photos at once, which can be useful if you have a batch of headshots to enhance.
Ensure that you have the necessary rights and permissions to use the photo for editing purposes.
4. Wait for the upload to complete
Once you have selected your headshot photo, the AI tool will initiate the uploading process. The duration of the upload will depend on various factors, including the size of the photo and your internet connection speed.
Be patient and allow the tool to transfer the photo to its servers or processing engine. Some AI tools may display a progress bar or a loading indicator to keep you informed of the upload status.
5. Confirm the successful upload
After the upload is complete, the AI tool will notify you of a successful upload or present a thumbnail preview of your headshot photo within the platform.
Take a moment to confirm that the uploaded photo matches your intended headshot.
Check for any anomalies or issues that may have occurred during the upload process, such as image distortion or loss of quality.
6. Explore additional settings or options
Depending on the AI tool you have chosen, there may be additional settings or options available before proceeding with the enhancement process.
Take some time to explore these features, as they can further customize the editing process based on your preferences.
These settings might include adjustment sliders for facial features, skin tone presets, or the ability to specify desired enhancements.
7. Prepare for the AI magic
With your headshot photo successfully uploaded to the AI tool and any additional settings configured, you are now ready to witness the transformative power of AI in action.
Get ready to explore the various enhancements and refinements that the tool offers, allowing you to create professional headshots that capture the essence and beauty of the subject.
D. Use facial recognition
Once you have uploaded your headshot photo to the AI tool, the next step is to leverage facial recognition capabilities.
Facial recognition is a powerful feature of AI that allows the tool to analyze and detect the various facial features present in the uploaded photo.
By accurately identifying these features, the AI tool can perform targeted enhancements and adjustments to create professional headshots.
In this section, we will delve into the step-by-step process of using facial recognition with the AI tool to unlock the full potential of your headshot photo.
1. Initiate facial recognition
Within the AI tool’s interface, locate and activate the facial recognition feature. This feature may be directly accessible or found within a menu or settings section.
Once enabled, the AI tool will begin scanning the uploaded headshot photo to identify and analyze the different facial features present.
2. Facial feature detection
As the AI tool analyzes the headshot photo, it uses advanced algorithms and machine learning models to detect and map the facial features.
These features typically include the eyes, eyebrows, nose, mouth, chin, and other key elements that contribute to the overall facial structure.
The tool examines the image to accurately identify and outline each feature, creating a digital representation of the face.
3. Landmark placement and alignment
After detecting the facial features, the AI tool proceeds to place landmarks or key points on the image that correspond to specific facial attributes.
These landmarks act as reference points for the subsequent enhancements and adjustments. The tool ensures proper alignment of the landmarks to ensure accurate manipulation of the facial features during the editing process.
4. Facial analysis and measurements
Once the landmarks are placed, the AI tool performs a detailed analysis of the facial proportions and measurements.
It assesses factors such as symmetry, facial ratios, and other aesthetic elements. This analysis enables the tool to make informed decisions and recommendations for enhancing the facial features and achieving a more balanced and appealing composition.
5. Customization and fine-tuning
Depending on the AI tool you are using, you may have the option to customize and fine-tune the facial recognition results.
This customization allows you to align the AI tool’s recommendations with your creative vision and the specific requirements of the headshot.
You can make adjustments to the placement of landmarks, refine the facial measurements, or override certain automated enhancements to achieve the desired look.
6. Preview and compare
Once the AI tool has completed the facial recognition and analysis, it generates a preview or visual representation of the detected facial features and their corresponding adjustments.
Take a moment to review and compare the before and after versions of the headshot. Pay attention to the enhancements made to individual facial features and assess the overall impact on the photo’s composition.
7. Iterate and refine
If you are not fully satisfied with the initial results, don’t hesitate to iterate and refine the facial recognition process.
Make further adjustments to the AI tool’s recommendations based on your artistic judgment and the specific goals you have for the headshot.
Fine-tune the enhancements until you achieve the desired level of professional quality.
E. Adjust facial proportions
Once the AI tool has analyzed and detected the facial features in your uploaded headshot photo, you have the power to further refine the facial proportions using the tool’s intuitive interface.
This step allows you to make precise adjustments to the size and shape of the eyes, nose, and mouth, ensuring that your headshot achieves the desired professional look.
In this section, we will explore the step-by-step process of adjusting facial proportions using the AI tool’s interface, enabling you to create headshots that exude confidence and professionalism.
1. Access the facial adjustment options
Within the AI tool’s interface, locate the options or tools specifically designed for adjusting facial proportions.
These tools may be labeled as “Facial Proportions,” “Face Sculpting,” or similar terms. Once you have found the appropriate feature, activate it to enter the facial adjustment mode.
2. Select the facial feature to adjust
Within the facial adjustment mode, you will typically find a selection of facial features that can be individually adjusted.
These features commonly include the eyes, nose, and mouth, as they play crucial roles in defining the overall appearance of the face. Choose the feature you wish to modify, such as the size or shape of the eyes, and proceed to the next step.
3. Make proportional adjustments
Using the AI tool’s interface, manipulate the sliders or controls associated with the selected facial feature.
These controls allow you to make proportional adjustments, increasing or decreasing the size, width, or height of the specific feature.
For example, you can make the eyes appear larger or smaller, adjust the width of the nose, or reshape the mouth. Pay attention to subtle changes and maintain a balanced and natural appearance.
4. Assess the impact of the adjustments
After making the desired adjustments to the selected facial feature, take a moment to assess the impact on the overall composition of the headshot.
Compare the modified version with the original to ensure that the adjustments harmonize with the rest of the facial features.
Keep in mind the natural proportions of the face and strive for a result that appears realistic and aesthetically pleasing.
5. Fine-tune and iterate
If necessary, continue fine-tuning the adjustments by making smaller refinements. Use the AI tool’s interface to make subtle tweaks to achieve the desired facial proportions.
Remember that the goal is to enhance and refine rather than completely alter the subject’s appearance. Iterate and refine the adjustments until you achieve the desired outcome.
6. Maintain a natural appearance
Throughout the process of adjusting facial proportions, it is crucial to maintain a natural and authentic appearance.
Avoid going to extremes that may result in an artificial or unrealistic look. Remember that the objective is to enhance the subject’s features while preserving their unique characteristics and personality.
Use your judgment and consider the context in which the headshot will be used, ensuring that the adjustments align with the intended purpose.
7. Preview and finalize the adjustments
Once you are satisfied with the adjustments made to the selected facial feature, preview the modified headshot in its entirety.
Assess how the adjusted feature integrates with the rest of the facial composition. If necessary, repeat the process for other facial features to achieve a balanced and harmonious overall result.
Once you are confident in the final adjustments, save the modified headshot and proceed to the next steps of the AI-powered editing process.
F. Enhance skin tones and texture
When it comes to creating professional headshots, enhancing skin tones and texture is a crucial step in achieving a polished and flawless appearance.
Fortunately, with the help of AI-powered tools, you can easily improve skin tones, reduce blemishes, and enhance skin texture to create headshots that exude a smooth and radiant complexion.
In this section, we will explore the step-by-step process of utilizing the AI tool’s features to enhance skin tones and texture, ensuring that your headshots showcase the best version of yourself.
1. Access the skin enhancement features
Within the AI tool’s interface, locate the skin enhancement features or tools designed specifically for improving skin tones and texture.
These features may be labeled as “Skin Enhancement,” “Skin Tone Correction,” or similar terms. Activate this feature to enter the skin enhancement mode.
2. Adjust skin tone and color
Using the AI tool’s interface, manipulate the sliders or controls associated with skin tone and color. These controls allow you to make adjustments to the overall skin tone, ensuring a more balanced and natural appearance.
You can tweak the warmth or coolness of the skin tones, as well as adjust the saturation to achieve the desired level of vibrancy.
Strive for a result that complements your natural complexion and enhances your features.
3. Reduce blemishes and imperfections
One of the remarkable capabilities of AI tools is their ability to reduce blemishes and imperfections on the skin.
Locate the blemish removal or skin correction features within the AI tool’s interface. Activate these tools and use them to target specific blemishes, such as acne, scars, or spots.
Adjust the intensity of the correction to achieve a balance between flawlessness and maintaining a natural look.
Be mindful not to overdo the blemish removal, as it may result in an artificial appearance.
4. Enhance skin texture
To create a smoother and more refined skin texture, utilize the AI tool’s features designed for skin texture enhancement. These tools can reduce the appearance of fine lines, wrinkles, and other skin imperfections.
Adjust the settings to refine the skin texture without losing the natural details. This step can significantly contribute to the overall professional look of the headshot.
5. Preview and fine-tune the enhancements
After making the initial adjustments to skin tones, blemishes, and texture, take a moment to preview the modified headshot.
Assess the impact of the enhancements on the overall appearance of the skin. Pay attention to details and make any necessary fine-tuning adjustments to achieve a natural and pleasing result.
Use your judgment and aim for a balanced outcome that highlights your best features.
6. Consider individual preferences
Remember that skin enhancements are subjective, and individual preferences may vary. Take into account your personal style, the intended purpose of the headshot, and the context in which it will be used.
Strive for a result that aligns with your vision and captures the essence of professionalism while maintaining authenticity.
7. Save and finalize the enhanced headshot
Once you are satisfied with the skin enhancements made using the AI tool, save the final version of the headshot.
Ensure that you retain a high-resolution image to preserve the quality of the enhancements. It is always a good practice to keep the original, unedited version as well for reference purposes.
With the enhanced skin tones and texture, your headshots will exude a flawless and professional appearance.
G. Refine lighting and exposure
Achieving optimal lighting and exposure in your headshots is essential for creating a well-balanced and professional look.
With the help of AI tools, you can refine the lighting and exposure settings to enhance the overall aesthetic appeal of your headshots.
In this section, we will explore the step-by-step process of using the AI tool’s settings to refine lighting and exposure, ensuring that your headshots have a captivating and professional appearance.
1. Familiarize yourself with the AI tool’s lighting and exposure controls
Within the AI tool’s interface, locate the lighting and exposure controls or settings. These controls may include options such as brightness, contrast, highlights, shadows, and mid tones.
Take a moment to familiarize yourself with these controls and understand how they affect the lighting and exposure of the image.
2. Assess the current lighting and exposure of the headshot
Before making any adjustments, carefully evaluate the current lighting and exposure of the headshot. Pay attention to areas that may appear too bright or too dark, as well as the overall balance of the lighting.
This assessment will serve as a baseline for your adjustments and help you identify areas that need refinement.
3. Adjust the brightness and contrast
Start by adjusting the brightness and contrast settings. Increase the brightness to lighten up the image or decrease it to darken specific areas.
Adjusting the contrast will enhance the visual separation between light and dark areas, adding depth and dimension to the headshot.
Fine-tune these settings to achieve a well-balanced overall exposure.
4. Manage highlights and shadows
Next, focus on managing the highlights and shadows in the image. Use the AI tool’s controls to recover any blown-out highlights or bring out details in shadowed areas.
Adjusting the highlights will help you control the brightest areas of the headshot, while modifying the shadows will allow you to add depth and richness to darker regions.
Aim for a balanced distribution of light and shadows to create a captivating and professional look.
5. Enhance midtones and tonal range
The midtones play a crucial role in determining the overall tonal range of the headshot. Use the AI tool’s controls to refine the midtones, ensuring that they are neither too bright nor too dark.
This adjustment will contribute to a more harmonious and natural appearance in the headshot.
Aim for a well-defined tonal range that showcases the details and contours of the face.
6. Preview and fine-tune the lighting and exposure adjustments
After making the initial adjustments, take a moment to preview the modified headshot. Evaluate the impact of the lighting and exposure refinements on the overall aesthetic.
Pay attention to the details and make any necessary fine-tuning adjustments to achieve the desired result.
Strive for a well-balanced, visually pleasing headshot that showcases your features in the best possible light.
7. Consider the intended purpose and artistic vision
As you refine the lighting and exposure, consider the intended purpose of the headshot and your artistic vision.
The lighting and exposure choices may vary depending on whether the headshot will be used for a corporate profile, a creative portfolio, or any other specific context.
Ensure that the adjustments align with your goals and convey the desired message.
8. Save and finalize the refined headshot
Once you are satisfied with the lighting and exposure refinements, save the final version of the headshot. Keep a high-resolution copy of the image to preserve the quality of the modifications.
It is also advisable to keep the original, unedited version for reference purposes.
By refining the lighting and exposure using AI tools, you can elevate your headshots to a new level of professionalism.
H. Apply virtual makeup
In the quest to create professional headshots, sometimes a little touch-up can go a long way. That’s where the option to apply virtual makeup comes into play.
With the help of AI tools, you can experiment with various virtual makeup options to enhance your facial features and create a polished and professional look.
In this section, we will explore the step-by-step process of using the AI tool’s virtual makeup features to elevate your headshots to the next level.
1. Select the desired virtual makeup options
Once you have uploaded your headshot to the AI tool’s interface, look for the virtual makeup options.
These options may include lipstick, eyeshadow, blush, contouring, and other enhancements. Take some time to explore the available choices and select the ones that align with your desired look.
Remember to aim for a subtle and natural enhancement that enhances your features rather than overpowering them.
2. Start with a clean canvas
Before applying any virtual makeup, it’s crucial to start with a clean canvas. Ensure that your headshot is well-lit and properly adjusted in terms of lighting, exposure, and facial proportions.
This will provide a solid foundation for the virtual makeup application and ensure that the enhancements blend seamlessly with your natural features.
3. Enhance the lips
One of the first areas to consider is the lips. If you desire a touch of colour or want to create the illusion of fuller lips, select a suitable lipstick shade from the virtual makeup options.
Adjust the intensity or opacity of the lipstick to achieve the desired effect.
Keep in mind that subtlety is key, as the goal is to enhance rather than overpower the lips.
4. Experiment with eyeshadow
Next, focus on the eyes and experiment with different eyeshadow options. Choose shades that complement your eye color and the overall tone of your headshot.
Apply the eyeshadow with precision and adjust the intensity to create depth and definition. Remember to blend the colors seamlessly for a natural and professional look.
5. Add a touch of blush or bronzer
To create a healthy and radiant glow, consider applying a touch of blush or bronzer. Select a shade that suits your skin tone and gently apply it to the apples of your cheeks.
The goal is to create a subtle flush or a sun-kissed effect that enhances your facial structure and adds warmth to the headshot.
6. Employ subtle contouring techniques
Contouring can help accentuate your facial features and create dimension in your headshot.
Use the AI tool’s virtual makeup options to apply subtle contouring to areas such as the cheekbones, jawline, and nose.
Be mindful of the natural shape of your face and use contouring techniques to enhance your best features without overdoing it.
7. Evaluate and fine-tune the virtual makeup application
After applying virtual makeup, take a step back and evaluate the overall effect. Make sure the enhancements blend seamlessly with your natural features and create a harmonious look.
If necessary, make small adjustments to the intensity, placement, or color of the virtual makeup to achieve the desired result.
Remember that subtlety and balance are key to maintaining a professional appearance.
8. Save and finalize the headshot with virtual makeup
Once you are satisfied with the virtual makeup application, save the final version of your headshot.
Keep a high-resolution copy of the image to preserve the quality of the enhancements.
It’s also a good practice to keep the original, unedited version for reference purposes.
With the application of virtual makeup using AI tools, you can elevate your headshots to a new level of professionalism.
9. Fine-tune details
Once you have reached the stage of fine-tuning your headshot, it’s time to focus on the smaller details that can make a significant impact on the overall quality and professionalism of the image.
With the help of the AI tool’s controls, you can refine specific details such as sharpening the eyes, enhancing eyebrow definition, and adjusting hair highlights.
In this section, we will explore how to achieve these refinements to ensure your headshots are picture-perfect.
10. Sharpen the eyes
The eyes are the windows to the soul, and they play a crucial role in headshots. To make them more captivating and engaging, utilize the AI tool’s controls to sharpen the eyes.
This adjustment enhances the clarity and detail of the eyes, making them stand out in the image.
Be cautious not to overdo the sharpening, as it can lead to an unnatural appearance. Aim for a subtle enhancement that brings out the natural beauty of the eyes.
11. Enhance eyebrow definition
Well-defined eyebrows can add structure and character to the face. Use the AI tool’s controls to enhance eyebrow definition, ensuring they are well-groomed and symmetrical.
You can adjust the color, shape, and thickness of the eyebrows to achieve the desired look. However, it’s essential to maintain a natural appearance and avoid making the eyebrows appear too harsh or artificial.
Pay attention to the overall harmony of the face and make adjustments accordingly.
12. Adjust hair highlights
Hair highlights can add dimension and depth to the headshot. With the AI tool’s controls, you can refine the hair highlights to achieve a more polished and professional look.
You have the option to adjust the intensity, color, and placement of the highlights to complement your features and enhance the overall aesthetic of the headshot.
Ensure that the hair highlights blend seamlessly with the rest of the image and appear natural.
13. Evaluate the fine-tuned details
After making adjustments to the eyes, eyebrows, and hair highlights, take a step back and evaluate the overall effect.
Pay attention to the balance and harmony of the refined details with the rest of the headshot. Make sure that the enhancements enhance your natural features and do not appear exaggerated or out of place.
If necessary, make minor adjustments to achieve a more cohesive and visually pleasing result.
14. Save and finalize the headshot with fine-tuned details
Once you are satisfied with the fine-tuned details, save the final version of your headshot. It’s recommended to keep a high-resolution copy of the image to preserve the quality of the refinements.
Additionally, consider keeping the original, unedited version for reference purposes. By utilizing the AI tool’s controls to fine-tune specific details, you can ensure that your headshots exude professionalism and attention to detail.
I. Customize enhancements
When using AI to create professional headshots, it’s important to remember that customization is key. Every individual has unique preferences and desired outcomes for their headshots.
To ensure that the AI tool’s enhancements align with your vision, you can tailor them by adjusting the intensity or opacity of specific features.
This allows you to fine-tune the enhancements to your liking and create headshots that truly reflect your personal style and brand.
1. Understand the available customization options
Before diving into the customization process, familiarize yourself with the specific customization options provided by the AI tool.
These options may vary depending on the tool you’re using, but they often include adjustments for features such as skin tone, eye color, lip color, and overall image tone.
Take the time to explore and experiment with these options to understand how they can be adjusted according to your preferences.
2. Assess the default enhancements
When you first upload your headshot to the AI tool, it may automatically apply a set of default enhancements.
These enhancements are designed to improve the overall appearance of the image. However, they might not align perfectly with your personal style or desired outcome.
Take a moment to assess the default enhancements and evaluate whether any adjustments need to be made.
3. Adjust the intensity of enhancements
One way to customize the enhancements is by adjusting their intensity. For example, if the AI tool has automatically enhanced the brightness of your eyes, but you prefer a more subtle effect, you can reduce the intensity of the eye enhancement feature.
Similarly, if the lip color appears too vibrant, you can adjust the intensity to achieve a more natural look.
By tweaking the intensity of specific enhancements, you can create a result that is more in line with your preferences.
4. Fine-tune the opacity of enhancements
In addition to adjusting the intensity, you can also customize the opacity of the enhancements. This allows you to control how prominently the enhancements are applied to the image.
For example, if the AI tool has smoothed the skin texture but you still want to retain some of the natural skin details, you can decrease the opacity of the skin enhancement feature.
This way, you achieve a more subtle and nuanced effect that suits your personal style.
5. Experiment and iterate
Customization is a creative process, and it often requires experimentation and iteration. Don’t be afraid to try different combinations of adjustments and observe the results.
Take the time to compare and analyze the variations, making note of the changes that you find most appealing.
This iterative approach allows you to refine the enhancements until they perfectly match your preferences.
6. Save and evaluate the customized enhancements
Once you have customized the enhancements to your satisfaction, save the final version of your headshot.
It’s essential to evaluate the customized enhancements in the context of the overall image.
Ensure that they blend seamlessly with the rest of the features and appear natural. If needed, make further adjustments to achieve a cohesive and polished result.
J. Save a baseline version
When using AI to create professional headshots, it’s always a good practice to save a baseline version of your original headshot before applying any drastic changes.
This baseline version serves as a reference point and allows you to revert back to the original image if needed.
Saving a baseline version provides you with flexibility and ensures that you have a starting point to compare and evaluate the modifications made through the AI tool.
1. Assess the original headshot
Before making any alterations, carefully evaluate the original headshot. Take note of its composition, lighting, and facial features.
This initial assessment helps you understand the existing qualities of the image and identify areas that might benefit from improvement.
By having a clear understanding of the starting point, you can make more informed decisions when applying enhancements through the AI tool.
2. Create a duplicate or backup of the original headshot
To save a baseline version, create a duplicate or backup of the original headshot. This ensures that you have a copy of the unaltered image to refer back to at any point in the editing process.
You can save the duplicate with a different file name or create a separate folder to store all the original versions.
This precautionary step safeguards your ability to return to the untouched image if desired.
3. Save the baseline version in a lossless format
When saving the baseline version, it’s important to choose a lossless file format such as TIFF or PNG.
These formats preserve the image quality without any loss of detail or compression artifacts.
By saving the baseline version in a lossless format, you maintain the highest possible image quality, ensuring that you have a reliable reference point for comparison purposes.
4. Maintain a structured file organization
To keep your editing process organized, establish a structured file organization system.
Create separate folders for each version of the headshot, including the baseline version, edited versions, and any intermediate stages.
This organization allows for easy retrieval and comparison of different versions, streamlining your workflow and helping you stay organized throughout the editing process.
5. Label and document the baseline version
To avoid confusion, clearly label and document the baseline version of your headshot.
Add a meaningful file name or include a brief description indicating that it is the original or baseline version.
Additionally, maintain a document or spreadsheet where you can track the changes made to each version, making it easier to refer back to specific modifications or compare different iterations.
6. Revisit the baseline version for comparison
Throughout the editing process, periodically revisit the baseline version to compare it with the edited versions.
This allows you to assess the impact of the modifications and determine if any adjustments need to be made.
By referring back to the baseline version, you can evaluate the overall progress and ensure that the enhancements align with your initial goals.
K. Experiment with presets
When using AI to create professional headshots, one way to expedite the editing process and explore different looks is by experimenting with presets or filters specifically designed for headshot enhancement.
These presets are pre-configured settings that apply a combination of adjustments to the image, offering a quick and convenient way to achieve desired outcomes.
By exploring the AI tool’s presets, you can discover various looks, styles, and enhancements that align with your vision for the headshot.
1. Familiarize yourself with the available presets
Start by familiarizing yourself with the presets or filters provided by the AI tool. These presets are often categorized based on different styles or effects, such as natural, vintage, glamour, or black and white.
Take the time to review the presets and understand the adjustments they apply to the headshot. This will help you select the most suitable preset based on your preferences and desired outcome.
2. Apply the presets to the headshot
Once you have identified the presets that catch your interest, apply them to the headshot. Most AI tools provide a simple and intuitive interface where you can easily select and apply presets with just a few clicks.
The AI algorithm will analyze the image and apply the preset’s predefined adjustments to enhance the headshot accordingly.
It’s important to keep in mind that presets serve as a starting point, and you can further customize the settings to achieve your desired look.
3. Assess the impact of the presets
After applying a preset, carefully assess the impact it has on the headshot. Observe how the preset affects the overall tone, color, contrast, and other aspects of the image.
Compare the edited version with the original to determine if the preset aligns with your vision for the headshot.
If the preset enhances the image according to your preferences, you can proceed with further adjustments.
However, if the result is not satisfactory, you can explore other presets or modify the settings to achieve the desired outcome.
4. Customize and fine-tune the presets
While presets offer a quick way to enhance headshots, they can also be customized to better align with your preferences.
Most AI tools allow you to adjust the intensity or opacity of the preset’s effects. This gives you the flexibility to fine-tune the enhancements to achieve a more tailored look.
For example, you can reduce the intensity of a skin smoothing effect while increasing the vibrancy of the colors.
By customizing the presets, you can create a unique and personalized style for your headshot.
5. Save and compare different preset variations
As you experiment with presets and customize their settings, it’s beneficial to save different variations of the edited headshot.
This allows you to compare and evaluate the different looks you have created. By saving multiple versions, you can easily revisit and compare them to determine which preset or customized settings produce the most desirable results.
This process of trial and error helps you find the perfect combination of enhancements that bring out the best in the headshot.
L. Compare before and after
When using AI to create professional headshots, it is crucial to compare the before and after versions of your image to evaluate the changes made by the AI tool.
This step allows you to assess the effectiveness of the enhancements and ensure that the final result meets your expectations.
The AI tool typically provides a comparison feature that enables you to view the original headshot side by side with the AI-enhanced version.
1. Activate the comparison feature
After applying the desired enhancements to your headshot, activate the comparison feature in the AI tool. This feature is usually accessible through a toggle button or a split-screen view.
By enabling the comparison mode, you can simultaneously view the original image and the AI-enhanced version, facilitating a direct comparison of the changes made.
2. Analyze the differences
Once the comparison mode is activated, carefully analyze the differences between the original headshot and the AI-enhanced version.
Pay attention to various aspects such as skin tone, texture, facial features, lighting, and overall image quality.
Observe how the AI tool has improved or altered these elements and whether the changes align with your desired outcome.
Look for any areas that might need further adjustments or refinement.
3. Consider your preferences and objectives
While analyzing the differences, consider your preferences and objectives for the headshot. Evaluate whether the AI enhancements have achieved the desired effect.
Ask yourself questions such as: Has the AI tool successfully enhanced the overall appearance? Are the adjustments in line with the intended style? Do the changes complement the subject’s features?
By aligning the AI enhancements with your specific goals, you can ensure that the final headshot reflects your vision.
4. Make additional adjustments if necessary
Based on your analysis and evaluation, you may identify areas that require further fine-tuning or refinement.
The AI tool may have made certain enhancements that you wish to modify or adjust. For example, you might want to reduce the intensity of a specific effect, enhance certain facial features, or address any issues that arise during the comparison.
Use the editing controls provided by the AI tool to make these additional adjustments until you are satisfied with the final result.
5. Save the final version
Once you have carefully compared the before and after versions, and made any necessary adjustments, it’s time to save the final version of your AI-enhanced headshot.
This version represents the desired outcome that aligns with your objectives and preferences.
Save the image in a high-resolution format to ensure its quality and usability for professional purposes.

M. Undo and redo adjustments
When using AI to create professional headshots, it’s important to have the flexibility to make adjustments and fine-tune the enhancements.
To achieve this, take advantage of the AI tool’s undo and redo functions, which allow you to revert or redo specific adjustments you have made.
These functions provide you with the freedom to experiment with different settings and revert changes if needed, ensuring that you achieve the desired outcome for your headshot.
1. Undo function
The undo function allows you to revert back to a previous state of your headshot. If you make an adjustment that you are not satisfied with or if you want to explore different options, you can simply click the undo button or use the keyboard shortcut provided by the AI tool.
This action will revert the last modification made to your image, allowing you to backtrack and explore alternative approaches.
For example, let’s say you applied a filter to enhance the skin texture of your headshot, but you find that it’s too intense and unrealistic.
By using the undo function, you can revert the skin texture adjustment and go back to the previous state where the skin had a more natural appearance.
This gives you the opportunity to make a different adjustment or try a different approach to achieve the desired outcome.
2. Redo function
The redo function allows you to reapply an adjustment that you have previously undone. If you decide to revisit a modification that you had undone earlier, you can click the redo button or use the corresponding keyboard shortcut.
This action will reapply the last undone adjustment, allowing you to quickly bring back a specific enhancement that you want to include in your headshot.
For instance, suppose you initially adjusted the brightness and contrast of your headshot but then decided to undo those changes.
Later on, during the editing process, you realize that the initial adjustments were actually necessary to improve the overall lighting and contrast.
With the redo function, you can easily bring back the previous adjustments and continue refining your headshot accordingly.
3. Utilizing undo and redo strategically
To effectively use the undo and redo functions, it’s important to approach your editing process with a strategic mindset.
Here are a few tips to help you make the most of these functions:
a. Experimentation
Use the undo and redo functions to experiment with different adjustments and settings.
Try various enhancements, and if you’re not satisfied with the results, use the undo function to revert and explore different options.
b. Step-by-step approach
Make adjustments incrementally and evaluate the impact of each change.
If you find that a particular modification didn’t yield the desired result, you can easily undo it and proceed with alternative adjustments.
c. Comparison
Take advantage of the comparison feature discussed earlier to compare the effects of adjustments before and after using the undo and redo functions.
This allows you to make informed decisions about which modifications work best for your headshot.
d. Save intermediate versions
If you’re unsure about a particular adjustment, consider saving intermediate versions of your headshot as you progress.
This way, you can easily revert back to a previous version if needed, even beyond the immediate undo history provided by the AI tool.

N. Export and save the edited headshot
Once you are satisfied with the edits and enhancements made to your headshot using the AI tool, it’s time to export and save the final version of your image.
This step ensures that you have a high-quality, professional headshot ready to be used for various purposes, such as online profiles, resumes, or promotional materials.
To achieve this, follow the steps below:
1. File format selection
Before exporting the headshot, consider the appropriate file format for your needs. Common file formats for images include JPEG, PNG, and TIFF.
JPEG is widely supported and suitable for most online platforms, while PNG preserves transparency and is ideal for images with a transparent background.
TIFF is a high-quality format often used for professional printing. Choose the format that aligns with your intended use for the headshot.
2. Resolution and image size
Ensure that the exported headshot has the appropriate resolution and image size. The resolution refers to the number of pixels per inch (PPI) and affects the image’s clarity and sharpness.
For online use, a resolution of 72 PPI is generally sufficient. However, if you plan to print the headshot, a higher resolution, such as 300 PPI, is recommended.
Additionally, consider the image size in terms of dimensions (width and height) to ensure it meets the requirements of the platforms or print materials you intend to use.
3. Save location and file naming
Choose a suitable location on your computer or storage device to save the edited headshot.
Create a folder specifically for your headshots or use an existing folder that organizes your professional images.
Additionally, give the file a meaningful and descriptive name that allows you to easily identify it later.
This could include your name, the purpose of the headshot, and the date to differentiate it from other files.
4. Export settings
Access the export or save options within the AI tool’s interface. These options may vary depending on the specific tool you are using.
Look for settings related to file format, image quality, compression, and metadata. Adjust these settings according to your preferences and the intended use of the headshot.
For example, if you prioritize image quality over file size, choose a higher-quality setting with minimal compression.
5. Review and confirm
Before finalizing the export process, take a moment to review the settings and ensure they align with your requirements.
Double-check the file format, resolution, image size, and save location. Confirm that you are satisfied with the edits made using the AI tool and that the exported headshot reflects the desired professional look you aimed to achieve.
6. Export and save
Once you have reviewed and confirmed the settings, initiate the export or save process. Click the appropriate button or option within the AI tool’s interface to begin exporting the headshot.
The AI tool will process the image according to the chosen settings and save it to the specified location.
The time required for exporting may vary depending on the complexity of the edits and the size of the image.
7. Backup and organization
After successfully saving the edited headshot, consider creating a backup of the file to avoid any potential loss.
This could involve copying the image to an external storage device or uploading it to a cloud storage service.
Also, maintain a well-organized file structure to easily locate your headshots in the future. This organization may include categorizing headshots by client, project, or date.

O. Review the results
After exporting and saving your AI-enhanced headshot, it’s important to review the results to ensure that the changes made by the AI tool appear as expected.
This step allows you to assess the overall quality, appearance, and accuracy of the edits before using the headshot for professional purposes.
To achieve this, follow the steps below:
1. Open the saved headshot
Locate the saved AI-enhanced headshot on your computer or storage device. Double-click on the file or use your preferred photo viewer or editor to open the image. This will allow you to view the headshot in its full size and detail.
2. Zoom in and examine details
Zoom in on the headshot to closely examine the finer details. Pay attention to areas that underwent specific enhancements, such as facial features, skin tones, or lighting adjustments.
Assess the clarity, sharpness, and accuracy of these areas to ensure they align with your desired outcome.
3. Compare with the original
If you have the original headshot available, open it alongside the AI-enhanced version. This will enable you to compare the two side by side and evaluate the changes made by the AI tool.
Look for improvements in facial features, skin appearance, lighting, and other aspects that you targeted during the editing process.
4. Assess overall quality
Evaluate the overall quality of the AI-enhanced headshot. Consider factors such as color accuracy, contrast, exposure, and image sharpness.
Ensure that the headshot maintains a natural and professional look, without any artifacts or inconsistencies introduced by the AI tool.
5. Check for unintended alterations
While the AI tool is designed to enhance the headshot, it’s possible that some unintended alterations may occur.
Look out for any distortions, artifacts, or unnatural effects that may have been introduced during the editing process.
Pay attention to areas like edges, fine details, and the overall integrity of the image.
6. Seek feedback from others
If possible, consider seeking feedback from trusted individuals such as colleagues, friends, or mentors.
Share the AI-enhanced headshot with them and ask for their opinion on the changes made.
Their fresh perspective can provide valuable insights and help ensure that the headshot aligns with your professional goals.
7. Make adjustments if necessary
If you identify any issues or areas for improvement during the review process, you may choose to make further adjustments.
Depending on your level of expertise and access to editing tools, you can refine specific elements manually or revisit the AI tool for additional enhancements.
However, exercise caution to avoid over-editing and maintain a natural appearance.
8. Save the final version
Once you are satisfied with the reviewed headshot and any necessary adjustments have been made, save the final version.
Use the same file format and save it to a location where it can be easily accessed for future use.
Consider appending a version number or date to the file name to differentiate it from previous iterations, especially if you plan to make further edits in the future.
P. Seek feedback
Seeking feedback on your AI-enhanced headshot is an essential step in the process of creating a professional image.
By sharing the headshot with trusted friends or colleagues, you can gather valuable insights into its professional appearance and identify potential areas for improvement.
Here’s how you can effectively seek feedback on your AI-enhanced headshot:
1. Choose trusted individuals
Select friends or colleagues whose opinions you value and trust. Ideally, they should have a good eye for aesthetics and understand the professional context in which the headshot will be used.
This could include mentors, coworkers, or individuals with experience in photography or image editing.
2. Explain the purpose
Clearly communicate the purpose of seeking feedback and provide context about the headshot.
Explain that you have used an AI tool to enhance the image and that you would appreciate their honest assessment of its professional appearance.
Emphasize that you value their input in helping you create a headshot that effectively represents you in a professional setting.
3. Share the headshot
Share the AI-enhanced headshot with the selected individuals. You can send it via email, share it through a messaging platform, or even arrange for an in-person meeting to present the headshot.
Ensure that the headshot is shared in a format and resolution that allows them to view it clearly and assess the details.
4. Ask specific questions
To guide the feedback process, ask specific questions about the headshot.
For example, you can inquire about the overall impression, whether the enhancements appear natural, or if there are any areas that could be further improved.
Encourage them to provide constructive criticism and suggestions for refinement.
5. Consider multiple perspectives
Take into account the feedback received from different individuals. Each person may have a unique perspective and notice different aspects of the headshot.
Look for common themes or suggestions that are mentioned by multiple individuals, as these can highlight areas that may require further attention.
6. Reflect on the feedback
Take time to reflect on the feedback you have received. Consider each comment or suggestion thoughtfully, and evaluate how it aligns with your professional goals and the image you wish to project.
Remember that feedback is subjective, and not all suggestions may resonate with you. Trust your judgment and prioritize changes that resonate with your vision.
Q. Make final adjustments if necessary
Making final adjustments to your AI-enhanced headshot is an important step in the process of creating a professional image that truly represents you.
After seeking feedback and considering the input received, it’s time to revisit the AI tool and make any necessary final adjustments or refinements.
Here’s how you can achieve this:
1. Review the feedback
Carefully review the feedback you received from trusted friends or colleagues. Take note of any specific suggestions or areas for improvement that were mentioned.
Consider the overall themes and patterns in the feedback to identify common areas that may need further attention.
2. Revisit the AI tool
Once you have a clear understanding of the adjustments or refinements required, revisit the AI tool you initially used for enhancement.
Launch the tool and open your saved headshot to access the editing features. Ensure you have a copy of the original headshot as well, in case you need to compare or refer back to it during the adjustment process.
3. Address specific concerns
Focus on addressing the specific concerns or suggestions raised during the feedback process.
For example, if someone mentioned that the skin tone appeared too artificial, you can adjust the skin enhancement settings to achieve a more natural look.
If there were suggestions about adjusting the lighting or refining facial features, utilize the relevant tools provided by the AI tool to make those changes.
4. Take an iterative approach
Make adjustments in small increments rather than applying drastic changes all at once.
This allows you to carefully evaluate the impact of each adjustment and ensure that you’re moving in the desired direction.
Remember that the goal is to enhance the headshot while maintaining a natural and professional appearance.
5. Consider the cumulative effect
As you make adjustments, keep in mind the cumulative effect they may have on the overall image.
Regularly compare the updated version with the original headshot to ensure that the enhancements are enhancing the desired aspects without compromising the overall integrity of the image.
It’s important to strike a balance between enhancing the image and preserving its authenticity.
6. Seek additional opinions if desired
If you’re uncertain about certain adjustments or would like a fresh perspective, you can seek additional opinions.
Share the updated headshot with trusted individuals and ask for their feedback. This can provide you with valuable insights and help you make informed decisions regarding the final adjustments.
7. Save a new version
Once you are satisfied with the final adjustments, save a new version of the AI-enhanced headshot.
It’s a good practice to save it with a different filename or version number to distinguish it from the previous versions.
This allows you to refer back to the specific version if needed and ensures that you have a finalized, professional image ready for use.
R. Consider additional editing
Once you have completed the AI-enhancement process and made final adjustments to your headshot, you may consider additional editing to add finishing touches.
This step allows you to further enhance the image using traditional photo editing techniques or other software tools.
Here’s how you can achieve it:
1. Evaluate the need for additional editing
Before diving into further editing, assess whether your AI-enhanced headshot requires additional enhancements.
Consider factors such as the intended use of the headshot, your personal preferences, and the professional standards in your industry.
Determine if there are specific aspects you would like to refine or if you are satisfied with the current state of the image.
2. Choose the appropriate software
To perform additional editing, you will need to choose the appropriate software or tools.
There are numerous options available, ranging from professional-grade photo editing software to more user-friendly applications.
Consider your level of expertise, desired features, and budget when selecting the software that best suits your needs.
3. Refine composition and framing
One aspect you may want to focus on during additional editing is the composition and framing of the headshot.
You can crop the image to remove any unnecessary elements or adjust the framing to improve the overall composition.
Pay attention to the positioning of the subject within the frame, ensuring that it adheres to the principles of good composition.
4. Fine-tune colours and tones
Colours and tones play a crucial role in the overall impact of a headshot. During additional editing, you can refine the color balance, saturation, and contrast to achieve the desired aesthetic.
Adjustments to colors and tones can help create a consistent and visually appealing look.
Be mindful of maintaining a natural appearance while enhancing the visual appeal of the headshot.
5. Retouch imperfections
Even with the AI enhancements, there may still be minor imperfections that can be addressed during additional editing.
You can use retouching techniques to remove blemishes, soften skin, or reduce distractions.
Exercise caution to maintain a realistic and professional appearance, ensuring that you don’t overdo the retouching and create an artificial look.
6. Sharpen details
To enhance the clarity and sharpness of specific details in the headshot, you can use sharpening techniques during editing.
Focus on sharpening the eyes, eyebrows, and other important facial features to draw attention and highlight their distinctiveness.
Use the appropriate tools in your chosen software to achieve the desired level of sharpness without introducing artifacts or noise.
7. Adjust lighting and exposure
If you find that the lighting and exposure of the headshot could benefit from further refinement, you can make adjustments during the additional editing process.
This can involve fine-tuning the brightness, contrast, or shadows to achieve a well-balanced and professional look.
Be mindful of preserving the natural lighting and avoiding excessive manipulation that may result in an unnatural appearance.
8. Save and export the final version
Once you have completed the additional editing, save the final version of your headshot in your desired file format and resolution.
Consider saving a high-resolution version for print purposes and a web-optimized version for online platforms.
Pay attention to any specific guidelines or requirements for file formats and sizes, depending on where you intend to use the headshot.
S. Use the AI-enhanced headshot
Once you have obtained your AI-enhanced headshot, it’s time to put it to use by applying it to your professional profiles, resumes, portfolios, or any other relevant platforms.
This step allows you to showcase your professional appearance and create a positive impression on potential employers, clients, or collaborators. Here’s how you can achieve it:
1. Update your professional profiles
Start by updating your professional profiles on platforms such as LinkedIn, professional networking websites, and industry-specific platforms.
Replace your existing profile picture with the AI-enhanced headshot. Make sure to follow the specific guidelines or requirements for image dimensions and file formats on each platform to ensure optimal display quality.
2. Revise your resume
Your resume is a crucial document that represents your professional qualifications and achievements.
Replace the existing photo on your resume with the AI-enhanced headshot.
Ensure that the headshot is positioned appropriately and aligned with the overall layout of your resume.
Pay attention to the image size, ensuring it is clear and well-proportioned within the document.
You might also want to read;
- Best AI Resume Builder Tools to Make a Job Winning Resume
- Best AI Tools for Job Seekers To Find Your Next High Paying Job
3. Enhance your portfolio
If you have an online portfolio or website showcasing your work, incorporate the AI-enhanced headshot into the design.
Place the headshot in a prominent location, such as the homepage or the “About Me” section.
Ensure that the headshot complements the overall aesthetic of your portfolio and maintains consistency with your personal branding.
4. Customize email signatures
Consider updating your email signature with the AI-enhanced headshot.
Including a professional photo in your email signature can add a personal touch and create a more memorable impression.
Ensure that the photo is properly resized to fit within the email signature and doesn’t affect the overall readability of your contact information.
5. Share on professional social media
If you are active on professional social media platforms such as Twitter, Instagram, or Facebook, consider sharing the AI-enhanced headshot with your network.
Accompany the photo with a brief update or caption highlighting any relevant professional achievements or milestones.
This can help strengthen your professional brand and attract attention from potential collaborators or employers.
6. Incorporate in marketing materials
If you engage in self-promotion or marketing activities, such as attending conferences, giving presentations, or participating in industry events, incorporate the AI-enhanced headshot into your marketing materials.
This could include event flyers, speaker profiles, or promotional materials. Use the headshot consistently across all materials to create a cohesive and recognizable personal brand.
7. Seek professional guidance
If you’re uncertain about how to best utilize your AI-enhanced headshot or if you want expert advice on optimizing its impact, consider seeking professional guidance from career coaches, photographers, or branding experts.
They can provide insights and suggestions tailored to your specific industry and goals, helping you make the most of your professional appearance.
Best AI Headshot Generators That Are Worth Checking Out
1. Aragon.ai
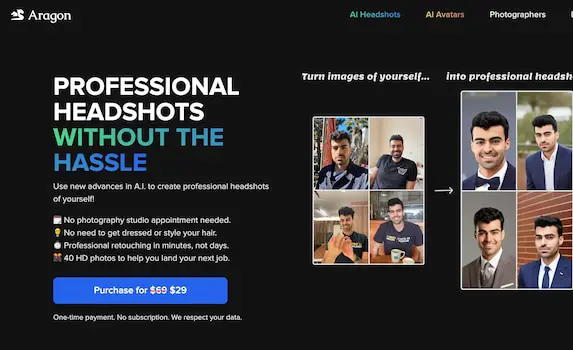
This is an advanced AI headshot generator that employs sophisticated algorithms to enhance the quality and visual appeal of your professional photos.
The tool works by utilizing artificial intelligence technology to analyze and optimize various aspects of the headshot, including facial features, skin tone, and overall image quality.
When you upload a headshot to Aragon.ai, the tool’s AI algorithms carefully examine the image and identify key facial features.
It then automatically adjusts these features to achieve a more balanced and visually pleasing composition. This can involve refining facial symmetry, adjusting proportions, and enhancing overall facial aesthetics.
In addition to facial feature adjustments, Aragon.ai also focuses on improving skin tone and texture.
The AI algorithms analyze the skin in the headshot, smoothing out imperfections and enhancing texture while maintaining a natural appearance. This process results in a polished and professional look, enhancing your overall image.
The AI-driven enhancements provided by Aragon.ai are designed to produce natural-looking results. The tool strives to preserve the individual’s unique features and avoid an overly edited or artificial appearance.
By enhancing the existing qualities of the headshot rather than drastically altering them, Aragon.ai aims to create a headshot that reflects your professional image authentically.
To use Aragon.ai, simply upload your headshot to the tool’s platform or application. The AI algorithms will then process the image and generate the enhanced version for you to download.
The tool operates quickly and efficiently, allowing you to save time and effort compared to manual editing.
Key features of Aragon.ai
Advanced AI algorithms
Aragon.ai utilizes advanced artificial intelligence algorithms to analyze and enhance headshots, ensuring high-quality results.
Facial feature adjustments
The tool can automatically adjust and refine facial features, such as symmetry and proportions, to create a more balanced and visually pleasing headshot.
Skin tone and texture enhancements
Aragon.ai can improve skin tone, smooth out imperfections, and enhance texture, resulting in a polished and professional appearance.
Lighting and color optimization
The AI algorithms optimize lighting, contrast, and color balance to create a well-lit and vibrant headshot.
Pros
Time-saving
Aragon.ai automates the process of enhancing headshots, saving you time and effort compared to manual editing.
Consistent results
The AI algorithms ensure consistent results across multiple headshots, maintaining a cohesive and professional look.
Natural-looking enhancements
Aragon.ai focuses on producing natural-looking enhancements, preserving the individual’s unique features and avoiding an overly edited appearance.
Cons
Dependency on input quality
The quality of the initial headshot can affect the effectiveness of the AI enhancements. Low-resolution or heavily distorted images may yield suboptimal results.
2. Limited customization
While Aragon.ai offers automated enhancements, the level of customization and fine-tuning options may be more limited compared to manual editing.
Frequently Asked Questions about Aragon.ai
Can I adjust the intensity of the enhancements?
Aragon.ai provides some level of customization, allowing you to adjust the intensity of the enhancements to suit your preferences.
What file formats does Aragon.ai support for the downloaded headshots?
Aragon.ai supports various common file formats, including JPEG, PNG, and TIFF, ensuring compatibility with different platforms and applications.
Is my data safe and secure when using Aragon.ai?
Aragon.ai prioritizes data privacy and security. Your uploaded images are processed securely, and the tool does not store or retain your data after the processing is complete.
Can I use Aragon.ai for commercial purposes?
Aragon.ai can be used for both personal and commercial purposes, allowing you to enhance headshots for professional profiles, marketing materials, and more.
2. Dreamwave.ai
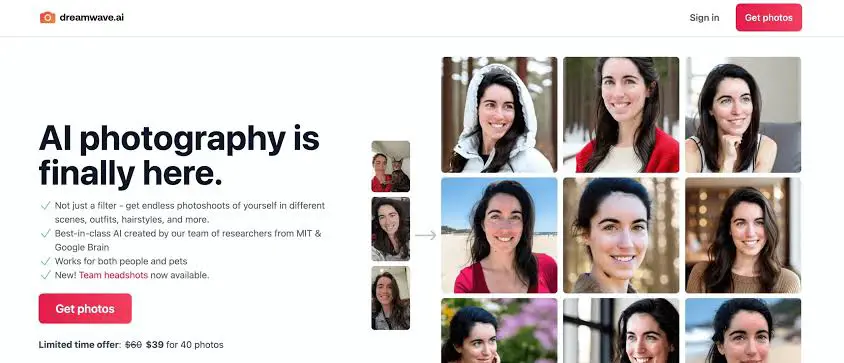
Dreamwave.ai is an AI headshot generator that utilizes advanced artificial intelligence algorithms to enhance and transform your headshots.
The tool works by analyzing the input image and applying intelligent adjustments to various facial features and elements.
It leverages deep learning techniques to understand facial structures, expressions, and other characteristics, allowing it to make realistic enhancements.
When you upload your headshot to Dreamwave.ai, the tool’s AI algorithms carefully examine the image and identify areas that can be improved.
It can automatically adjust elements like skin tone, complexion, and blemishes, giving your headshot a polished and professional appearance.
The AI also has the capability to enhance facial features such as eyes, eyebrows, lips, and hair, creating a visually appealing result.
Dreamwave.ai provides a range of customization options, allowing you to fine-tune the intensity and opacity of the enhancements.
This means you have control over how subtle or pronounced the changes are, ensuring that the final result aligns with your personal preferences. You can experiment with different settings to achieve the desired look and feel.
The AI algorithms employed by Dreamwave.ai have been trained on vast amounts of data, including diverse headshot images, to ensure accurate and natural-looking results.
The tool is designed to understand and adapt to various face shapes, sizes, and lighting conditions, enabling it to deliver consistent enhancements regardless of the input image.
Dreamwave.ai also offers batch processing, which means you can upload multiple headshots at once and have them processed simultaneously.
This feature saves you time and effort, especially if you have a large collection of headshots that require enhancement.
Once the AI has applied the necessary adjustments, you can preview the enhanced headshot and compare it to the original image.
This allows you to evaluate the changes made and ensure they meet your expectations. If needed, you can make further refinements using the tool’s customization options or export the image to other photo editing software for additional editing.
Key features
Advanced AI algorithms
Dreamwave.ai utilizes cutting-edge artificial intelligence algorithms to generate high-quality headshots with realistic enhancements.
Facial feature adjustments
The tool allows you to modify various facial features, such as adjusting the smile, changing the hairstyle, or altering the eye color, to achieve your desired look.
Professional filters and styles
Dreamwave.ai offers a range of filters and styles to enhance the overall aesthetic of your headshots, providing options for different industries and preferences.
Customization options
Users have the flexibility to fine-tune the intensity and opacity of the enhancements, enabling personalized adjustments to suit individual preferences.
Batch processing
Dreamwave.ai supports batch processing, allowing you to generate multiple headshots simultaneously, saving time and effort.
Pros
Time-saving
Dreamwave.ai simplifies the headshot creation process by automating the editing and enhancement tasks, reducing the time and effort required compared to manual editing.
Professional results
The tool produces high-quality headshots with realistic enhancements, making them suitable for professional use across various platforms.
User-friendly interface
Dreamwave.ai features an intuitive and user-friendly interface, making it accessible to users with varying levels of technical expertise.
Customization options
The ability to adjust the intensity and opacity of enhancements provides users with a personalized editing experience, ensuring the final headshots align with individual preferences.
Cost-effective
Using an AI headshot generator like Dreamwave.ai can be a cost-effective solution compared to hiring a professional photographer or retoucher.
Cons
Limited control
While Dreamwave.ai offers customization options, some users may find the level of control over specific details to be limited compared to manual editing.
2. Learning curve
While the tool is user-friendly, there might be a learning curve for users who are new to AI headshot generators or photo editing software in general.
3. Dependency on AI algorithms
The quality and accuracy of the generated headshots rely on the performance of the AI algorithms, and results may vary depending on the input image and desired adjustments.
Frequently Asked Questions about Dreamwave.ai
Can I use Dreamwave.ai for commercial purposes?
Yes, Dreamwave.ai allows commercial usage of the generated headshots.
Can I edit the generated headshots further in other software?
Yes, the generated headshots can be exported and edited in other photo editing software for further refinements if desired.
Does Dreamwave.ai offer a free trial?
Dreamwave.ai may offer a free trial period for users to experience the tool’s features before committing to a subscription or purchase.
What file formats are supported for exporting the headshots?
Dreamwave.ai typically supports common image file formats such as JPEG, PNG, and TIFF for exporting the generated headshots.
3. Headshot AI
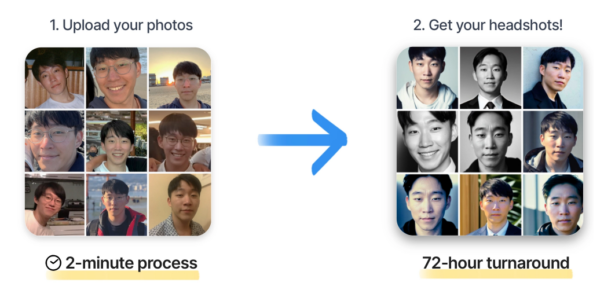
This is an advanced AI headshot generator designed to help you enhance your professional photos with ease.
The tool leverages the power of artificial intelligence algorithms to analyze and improve various aspects of your headshots, resulting in polished and high-quality images.
When you use Headshot AI, the first step is to upload your headshot to the platform. The tool will then process the image using its AI algorithms, which are trained to recognize facial features, skin tones, and other details that contribute to the overall appearance of a headshot.
During the processing stage, Headshot AI analyzes the image and applies intelligent enhancements to enhance the key elements.
These enhancements can include adjustments to skin tone, smoothing of skin texture, sharpening of facial features, and even subtle retouching.
The goal is to create a professional and appealing headshot that highlights your best features while maintaining a natural look.
Once the processing is complete, you’ll be presented with the enhanced version of your headshot. At this point, you have the option to review and fine-tune the adjustments made by the AI.
Headshot AI provides customization options that allow you to adjust the intensity or opacity of specific enhancements according to your preferences.
This level of control ensures that you can tailor the final result to your liking and achieve the desired professional look.
After you’re satisfied with the adjustments, you can save the enhanced headshot in your preferred file format, such as JPEG or PNG.
This allows you to easily download and utilize the enhanced image for various purposes, including professional profiles, resumes, portfolios, or social media.
Headshot AI simplifies the process of enhancing headshots by automating the editing workflow through advanced AI technology.
The tool eliminates the need for complex manual editing techniques, saving you time and effort. It is designed to be user-friendly, even for individuals with limited editing experience, making it accessible to a wide range of users.
Key features
AI-based Enhancements
Headshot AI utilizes advanced artificial intelligence algorithms to automatically enhance and refine various aspects of your headshots, including skin tone, complexion, and facial features.
Customization Options
The tool provides flexibility in adjusting the intensity and opacity of the enhancements, allowing you to fine-tune the results according to your preferences.
Batch Processing
With Headshot AI, you can process multiple headshots simultaneously, saving time and effort when enhancing a collection of photos.
User-Friendly Interface
The tool offers an intuitive and user-friendly interface, making it accessible to both professionals and individuals looking to improve their headshots.
Pros
Time-Saving
Headshot AI streamlines the process of enhancing headshots, eliminating the need for manual editing and saving valuable time.
2. Professional Results
The AI algorithms used by Headshot AI deliver high-quality and natural-looking enhancements, resulting in professional-grade headshots.
3. Versatility
The tool can be used by various individuals, including professionals in need of polished headshots for business profiles, resumes, or portfolios, as well as individuals looking to enhance their personal photos.
Cons
Limited Customization
While Headshot AI provides customization options, some users may find the level of control over the enhancements to be limited compared to manual editing techniques.
2. Dependency on AI
The tool relies on artificial intelligence algorithms, which may not always produce the desired results for every individual or specific editing requirements.
Frequently Asked Questions about Headshot AI
How does Headshot AI work?
Headshot AI uses AI algorithms to analyze and enhance various aspects of headshots, such as skin tone, complexion, and facial features, resulting in improved and polished images.
Can I adjust the intensity of the enhancements?
Yes, Headshot AI allows you to customize the intensity and opacity of the enhancements to achieve the desired look.
Can I process multiple headshots at once?
Yes, Headshot AI offers batch processing, enabling you to enhance multiple headshots simultaneously.
What file formats does Headshot AI support?
Headshot AI supports popular image file formats such as JPEG and PNG.
4. ProPhotos.ai
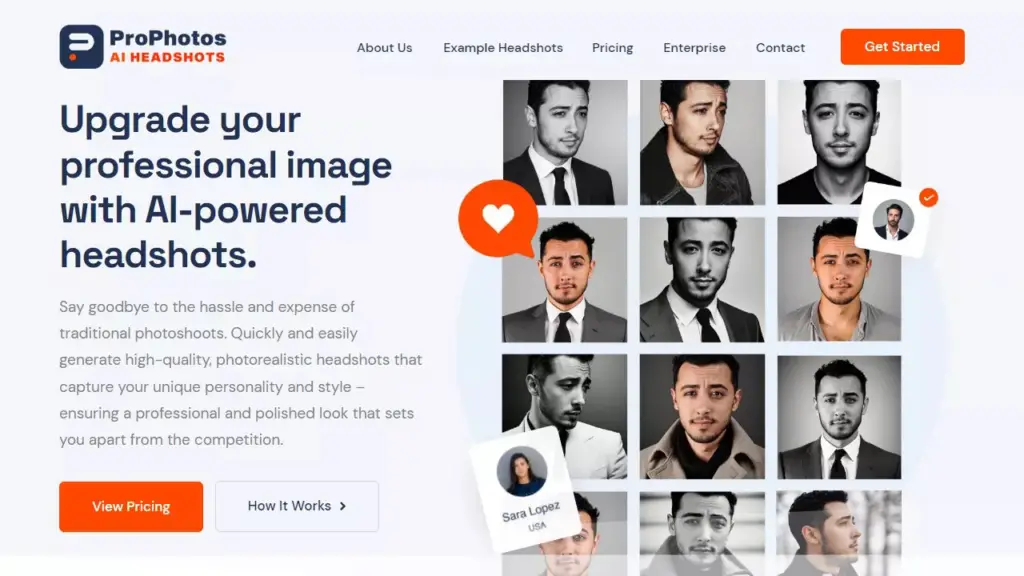
ProPhotos.ai is an advanced AI headshot generator that utilizes cutting-edge technology to enhance and improve the quality of your professional photos.
The tool works by employing sophisticated AI algorithms to analyze and make adjustments to various aspects of the headshot, resulting in an enhanced and polished final image.
To begin, you simply upload your headshot to the ProPhotos.ai platform. The AI algorithms then go to work, carefully examining the facial features, skin tone, and overall composition of the image.
It identifies areas that can be enhanced to create a more professional and visually appealing result.
The AI algorithms employed by ProPhotos.ai are trained on vast amounts of data, allowing them to understand and recognize the ideal attributes of a high-quality headshot.
The tool can automatically adjust facial features to improve symmetry, smooth out skin imperfections, and enhance overall skin tone.
It can also optimize lighting, contrast, and color balance to ensure a well-balanced and pleasing aesthetic.
Key features of ProPhotos.ai
AI-Based Enhancement
ProPhotos.ai utilizes advanced AI algorithms to analyze and enhance headshots, automatically making adjustments to improve facial features, skin tone, and overall appearance.
Customization Options
The tool provides users with customization options to fine-tune the enhancements according to their preferences. This allows for personalized adjustments to achieve the desired professional look.
Natural-Looking Results
ProPhotos.ai focuses on maintaining a natural and realistic appearance in the enhanced headshots. The AI algorithms are trained to preserve the individual’s unique characteristics while enhancing the overall quality.
Quick and Efficient Processing
The platform ensures fast and efficient processing of headshots, allowing users to receive the enhanced results promptly.
Pros
Time-Saving
ProPhotos.ai automates the headshot enhancement process, eliminating the need for complex manual editing techniques. This saves you time and effort, especially when enhancing multiple headshots.
2. Professional Results
The AI algorithms employed by ProPhotos.ai are designed to produce professional-looking headshots with improved facial features, skin tone, and overall quality. This helps you present a polished and impressive appearance across professional platforms.
3. User-Friendly Interface
ProPhotos.ai offers a user-friendly interface that is easy to navigate, making it accessible to users of all skill levels. You can quickly upload your headshots and apply enhancements without technical expertise.
Cons
Dependency on AI
As an AI-based tool, ProPhotos.ai relies on algorithms to make enhancements. While the algorithms are trained to provide high-quality results, there may be instances where manual editing techniques or additional adjustments are preferred.
Limited Control
While ProPhotos.ai offers customization options, the level of control may be limited compared to manual editing. Users who desire more precise adjustments may find the customization options somewhat restricted.
Frequently Asked Questions about ProPhotos.ai
Is my privacy protected when using ProPhotos.ai?
ProPhotos.ai takes user privacy seriously and ensures that all uploaded images are securely processed. The platform follows strict privacy protocols to safeguard user data.
Can I download and save the enhanced headshots?
Yes, once you are satisfied with the enhanced headshots, you can download and save them in your preferred file format for further use.
Can ProPhotos.ai be used for other types of photo editing?
ProPhotos.ai is primarily focused on headshot enhancement. While it may offer some general photo editing features, its main strength lies in enhancing facial features and improving headshots.
Can I undo or revert the enhancements made by ProPhotos.ai?
ProPhotos.ai provides options to undo or redo adjustments, allowing you to revert back to the original or redo specific enhancements as needed.
5. StudioShot

This powerful tool utilizes artificial intelligence algorithms to analyze and enhance various aspects of your headshot, resulting in a polished and visually appealing final image.
When you upload your headshot to StudioShot, the AI algorithms immediately begin their work. They carefully analyze the facial features, including symmetry and proportions, to ensure a balanced and aesthetically pleasing composition.
The tool automatically adjusts these features to create an optimized appearance while preserving your unique characteristics.
StudioShot also pays special attention to skin tone and texture. The AI algorithms enhance the skin by smoothing out imperfections and refining the overall texture, resulting in a natural and flawless look.
They aim to strike a balance between improving the quality of the skin while maintaining its authenticity.
Lighting and color play a crucial role in headshots. StudioShot optimizes these elements to create a well-lit and vibrant image.
The AI algorithms adjust lighting conditions, contrast, brightness, and color balance to bring out the best in your headshot.
The goal is to ensure that your features are well-defined and the colors appear accurate and appealing.
Throughout the process, StudioShot strives to achieve natural-looking results. While enhancing your headshot, the tool avoids over-editing or creating an artificial appearance.
It aims to enhance your photo in a way that looks professional and authentic, ensuring that your final headshot showcases your true self.
Key features
Advanced AI algorithms
StudioShot utilizes sophisticated artificial intelligence algorithms to analyze and enhance headshots, resulting in high-quality and visually appealing images.
Facial feature refinement
The tool automatically adjusts facial features, including symmetry and proportions, to create a balanced and aesthetically pleasing composition.
Skin tone and texture enhancement
StudioShot improves skin tone and texture while maintaining a natural appearance, smoothing out imperfections and enhancing overall skin quality.
Lighting and color optimization
The AI algorithms optimize lighting conditions, contrast, brightness, and color balance to create well-lit and vibrant headshots.
Natural-looking results
StudioShot aims to preserve the individual’s unique features and avoid an overly edited or artificial appearance, producing headshots that look authentic and professional.
Pros
Time-saving
StudioShot’s AI-driven enhancements automate the editing process, saving you valuable time compared to manual editing.
Professional results
The tool’s advanced algorithms ensure that the final headshots have a polished and professional look, suitable for professional profiles, resumes, and portfolios.
User-friendly interface
StudioShot provides a user-friendly platform or application that makes it easy to upload and process headshots.
Cons
Dependency on AI algorithms
The tool’s effectiveness relies on the quality of its AI algorithms, and there may be instances where the results may not meet expectations.
Limited customization
While StudioShot offers automated enhancements, it may not provide the level of customization and control that some users may desire for specific editing preferences.
Frequently Asked Questions about StudioShot
How do I use StudioShot?
To use StudioShot, simply upload your headshot to the tool’s platform or application. The AI algorithms will process the image and generate the enhanced version for you to download.
Does StudioShot support different file formats?
StudioShot typically supports popular image file formats such as JPEG, PNG, and TIFF. However, it’s recommended to check the tool’s documentation or website for specific supported formats.
Can I undo or revert the AI enhancements applied by StudioShot?
Some AI headshot generators may offer the option to revert or adjust the applied enhancements. It’s advisable to explore the tool’s interface or settings to see if such options are available.
Are there any restrictions on the size or resolution of the headshot I can upload to StudioShot?
The tool may have limitations on the file size or resolution of the headshots that can be processed. Refer to the tool’s guidelines or documentation for information on supported sizes and resolutions.
Does StudioShot work equally well on all types of headshots?
StudioShot is designed to work with a variety of headshots, but the effectiveness of the AI enhancements may vary depending on factors such as image quality, lighting conditions, and the original composition of the headshot.
PFPMaker
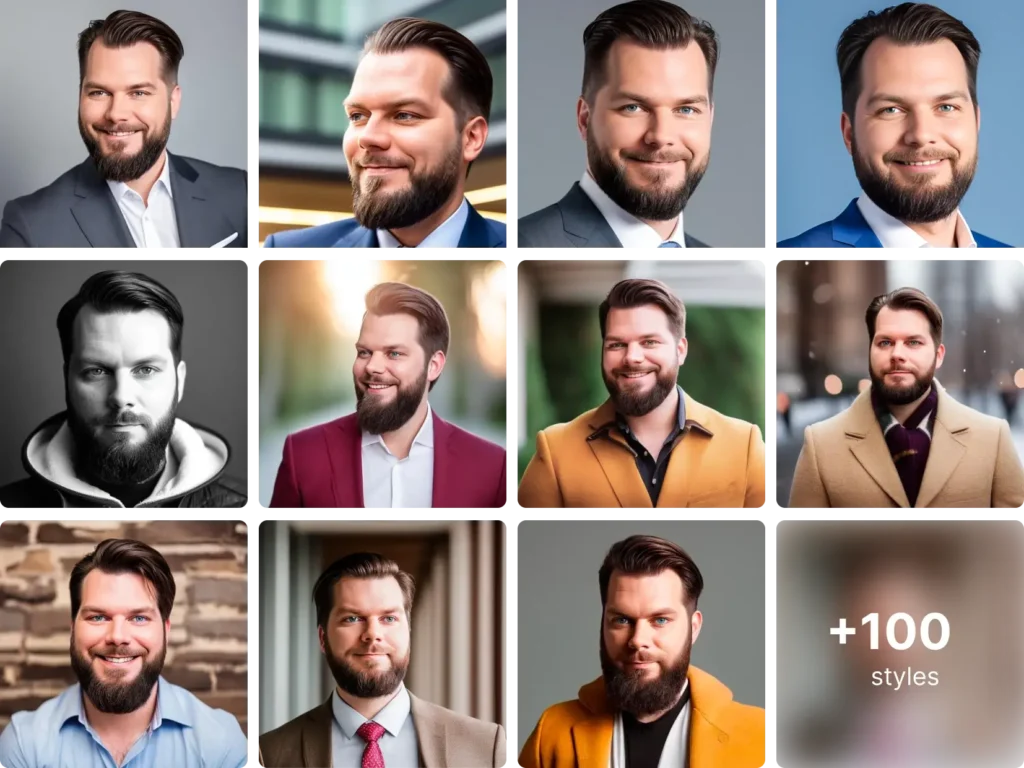
PFPMaker is an exceptional AI headshot generator that employs cutting-edge artificial intelligence algorithms to analyze and modify your headshots, resulting in visually stunning images that capture attention and make a lasting impression.
The tool begins by analyzing various aspects of your headshot, such as facial features, skin tone, lighting conditions, and color balance.
Using advanced facial recognition technology, PFPMaker carefully examines the proportions, symmetry, and balance of your facial features to ensure an aesthetically pleasing composition.
It then applies intelligent adjustments to enhance your appearance while maintaining your unique characteristics.
One of the key focuses of PFPMaker is skin smoothing and refinement. The tool employs sophisticated techniques to reduce imperfections, blemishes, and uneven skin tone, resulting in a natural and flawless look.
It aims to strike a balance between enhancing your appearance and preserving your authentic features, creating a headshot that exudes professionalism.
PFPMaker also pays special attention to lighting and color optimization. It analyzes the lighting conditions in your original headshot and intelligently adjusts the brightness, contrast, and color balance to create a well-lit and vibrant image.
The tool aims to enhance the visibility of your facial features, highlight your best attributes, and ensure accurate and appealing colors in the final photo.
Using PFPMaker is a seamless and user-friendly experience. You can easily upload your headshot to the tool’s interface and navigate through the enhancement process without any technical expertise.
Key features of PFPMaker
AI Enhancement
PFPMaker utilizes AI algorithms to analyze and enhance various aspects of your headshot, including facial features, skin tone, lighting, and color balance. It aims to create a polished and professional appearance while maintaining your unique characteristics.
Facial Analysis and Adjustment
The tool carefully examines the proportions, symmetry, and balance of your facial features. It automatically adjusts these elements to ensure a visually pleasing composition and optimize your overall appearance.
Skin Smoothing and Refinement
PFPMaker pays special attention to skin tone and texture. It applies intelligent skin smoothing techniques to reduce imperfections, blemishes, and uneven skin tone. The goal is to achieve a natural and flawless look without compromising your authenticity.
Lighting and Color Optimization
The tool enhances lighting conditions, contrast, brightness, and color balance to create a well-lit and vibrant headshot. It aims to highlight your features and ensure accurate and appealing colors in the final image.
User-Friendly Interface
PFPMaker provides a user-friendly interface that allows you to easily upload your headshot and navigate through the enhancement process. The intuitive design makes it accessible to users of all skill levels, ensuring a hassle-free experience.
Pros
- Provides impressive AI-powered enhancements that transform your headshots into professional-grade images.
- Offers facial analysis and adjustment to optimize the composition and balance of your features.
- Improves skin tone and texture while maintaining a natural and authentic appearance.
- Optimizes lighting and color to create a visually appealing and vibrant headshot.
- User-friendly interface makes it easy to upload and enhance your headshots.
Cons
- Specific limitations
Frequently Asked Questions about PFPMaker
How long does it take to process a headshot with PFPMaker?
The processing time may vary depending on the complexity of the image and the server load. Generally, it takes a few seconds to a few minutes to process a headshot.
Can PFPMaker handle different file formats?
PFPMaker supports various popular image file formats, such as JPEG, PNG, and TIFF. It is recommended to refer to the tool’s documentation for a comprehensive list of supported file formats.
Can I undo the enhancements made by PFPMaker?
Some AI headshot generators, including PFPMaker, offer the option to adjust the level of enhancements or revert to the original image. It is advisable to explore the tool’s interface or documentation for instructions on undoing or modifying the enhancements.
Don’t Miss: How to Make Money With AI Headshot (16 Secret Ways)
Final Thoughts
As a professional in the field of AI and photography, I firmly believe that utilizing AI to create professional headshots can be a game-changer in today’s digital age.
The advancements in AI technology have revolutionized the way we approach headshot photography, offering innovative tools and techniques to enhance our professional appearance.
By harnessing the power of AI, we can tap into a world of endless possibilities for transforming our headshots.
It’s like having a skilled digital artist at our fingertips, capable of analyzing and enhancing our features with precision and creativity.
The AI algorithms can refine our skin, optimize lighting, and even adjust facial proportions, resulting in captivating and visually striking headshots.
What sets AI-generated headshots apart is their ability to strike the perfect balance between authenticity and enhancement.
While traditional retouching techniques may sometimes result in an overly airbrushed or artificial look, AI technology understands the nuances of human features and strives to enhance them while preserving our unique characteristics.
This ensures that our headshots still capture our true essence and personality.
In this digital era where first impressions matter greatly, using AI to create professional headshots has become a valuable tool in showcasing our competence and professionalism.
It’s a way to stand out from the crowd and leave a lasting impact on potential clients, employers, or collaborators.


This is a great tip particularly to those new to using AI to generate headshot for professional event. Simple but very precise information. Thanks for sharing this one. A must read article!